Answer Options
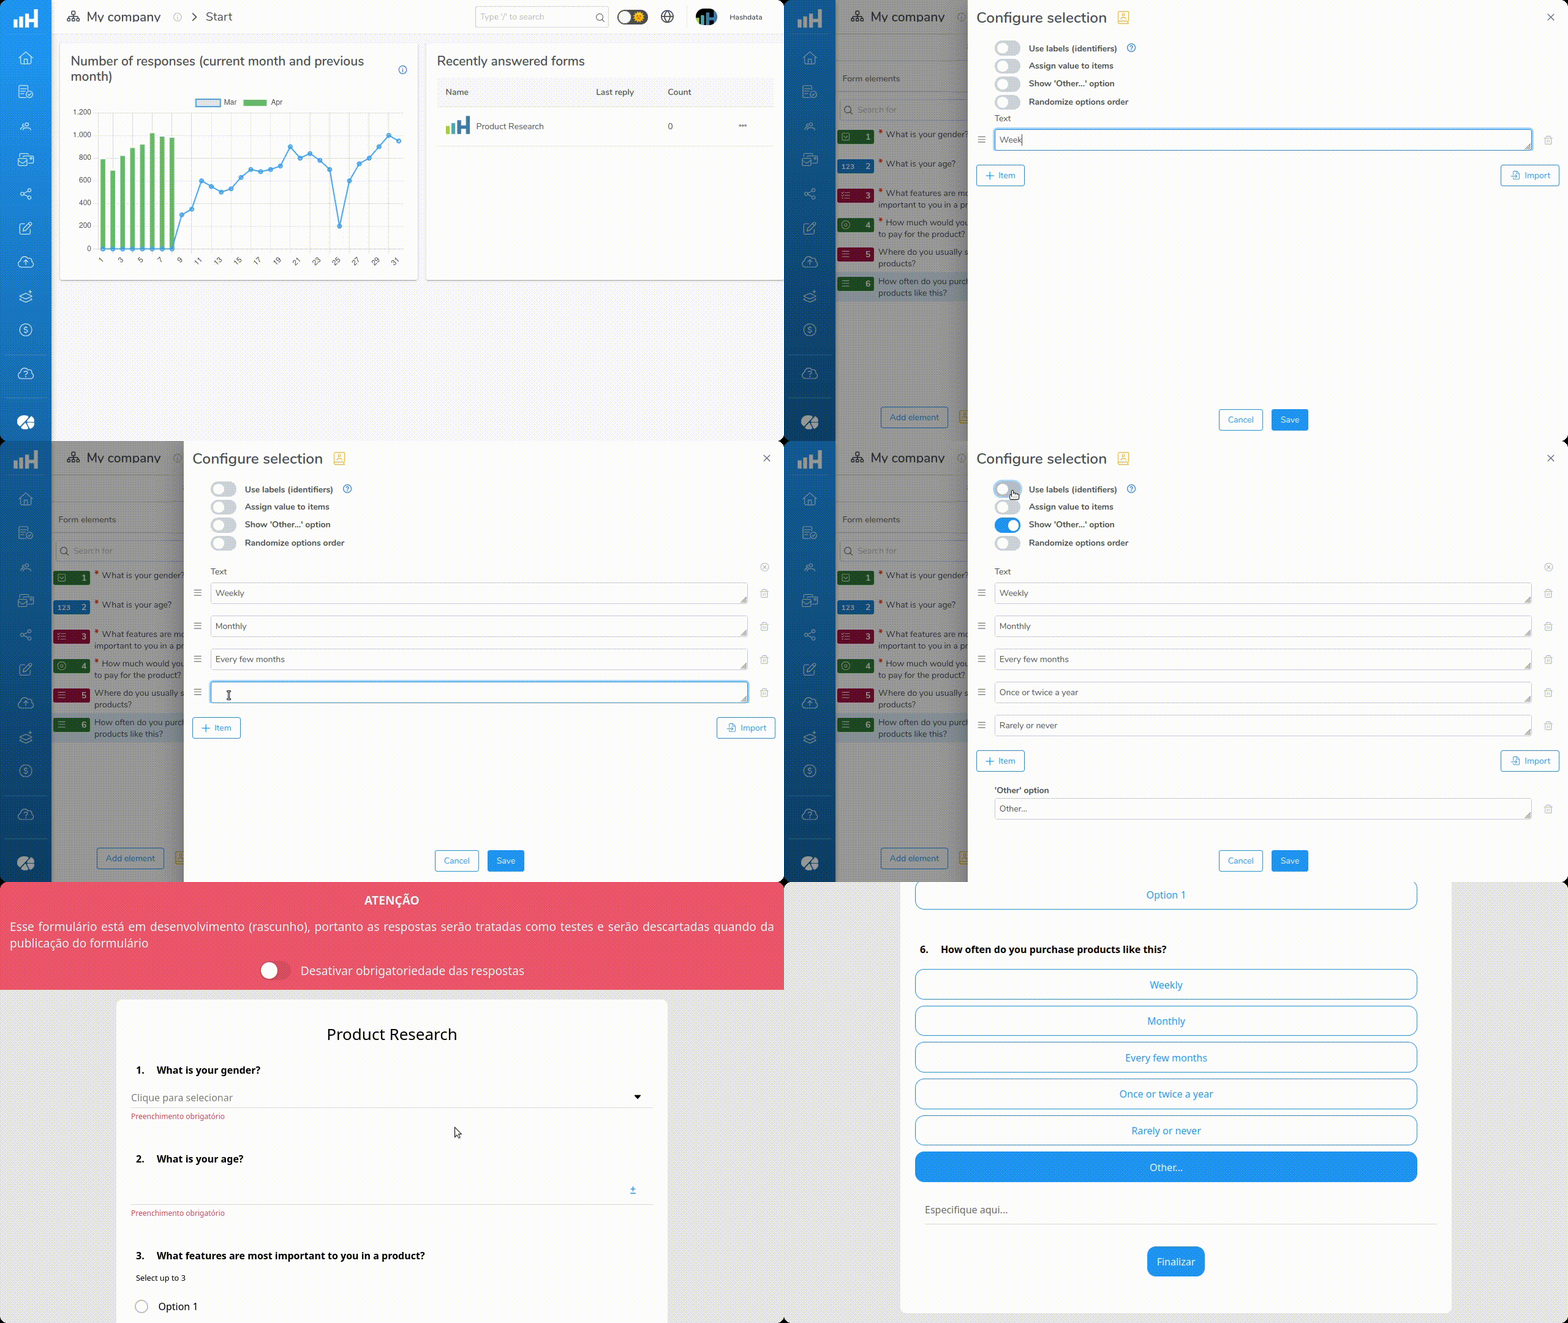
For Single selection and Multiple selection type elements, it is necessary to configure the response items that will be presented in the form for data collection.
The Answer Options functionality allows you to customize the options that will be presented to the user, adjust the attributes of each option, the order in which they appear, and include labels and values for the items.
To include answer options
- Click
;
- Fill in the text field with the description of the option;
- Fill in the Tag (identifier) and Value fields, if they are enabled.
- To change the order of items, click
(to the left of the option), hold and drag to the desired position.
- Click
to save the settings.

Features of the Answer Options configuration. Click the image to enlarge it
Answer option parameters
| Parameter | Description |
|---|---|
Use tags (identifiers) | Labels are used in reports and chart legends when the selected item is longer than 35 characters. They are administrative elements and are not displayed in the form (only the 'Text' field is displayed in the form). |
Assign value to items | Allows you to assign values to each of the response options. These values can be used in mathematical formulas to calculate derived values such as averages, maximums, minimums, standard deviations, etc. Learn more... |
Show 'Other...' option | Includes an additional alternative for the user to choose from if none of the predefined options apply to their situation. |
Randomize option order | Randomly rearrange the sequence of available options with the goal of removing bias introduced by a fixed order and ensuring fairer or more unpredictable results. |
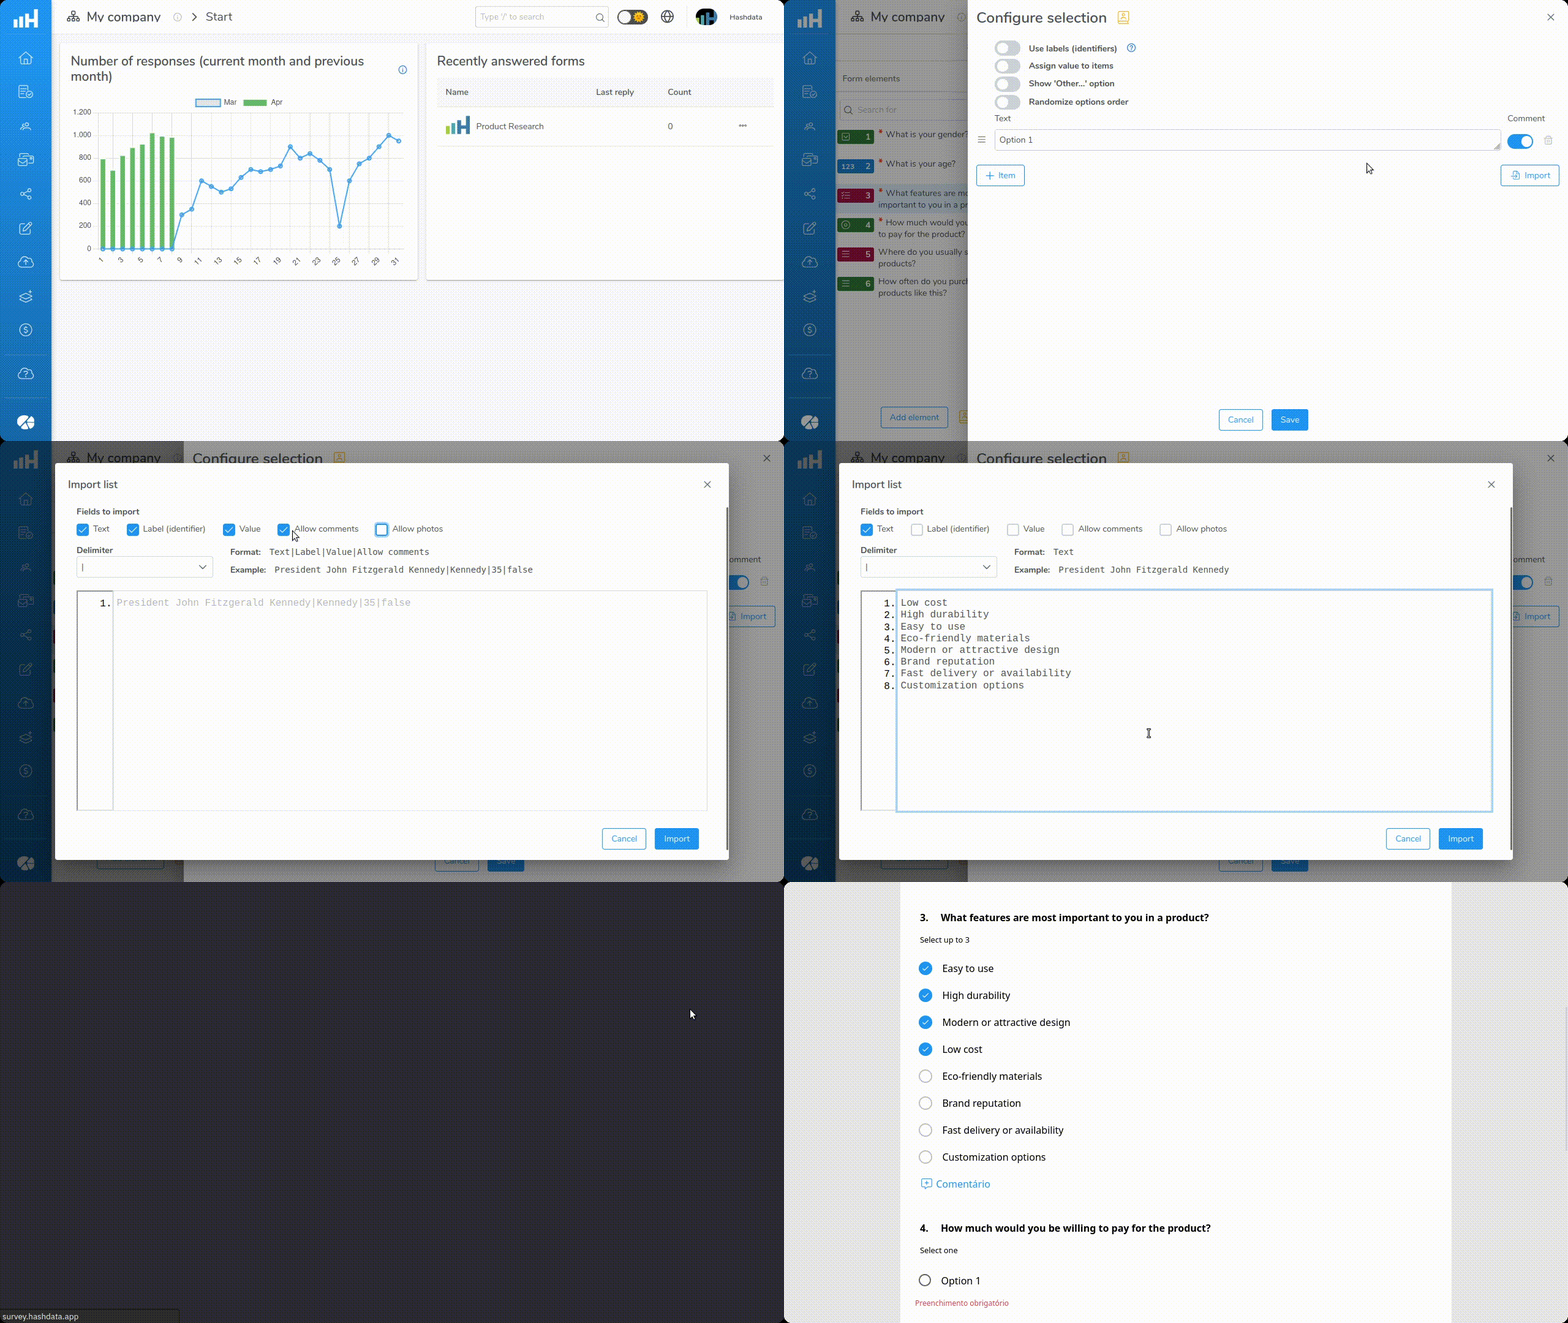
To Import answer options from the Clipboard or enter them directly
- Click on
. A dialog box with import options will open;
- Define the fields to be included in the import of options: Text (always required), Label, Value, Allow comments, and Allow photos;
- Choose the field delimiter. See the options in the dropdown menu;
- Type or paste the options to be imported;
- Review the values and click on
, to complete.

Importing answer options. Click the image to enlarge it
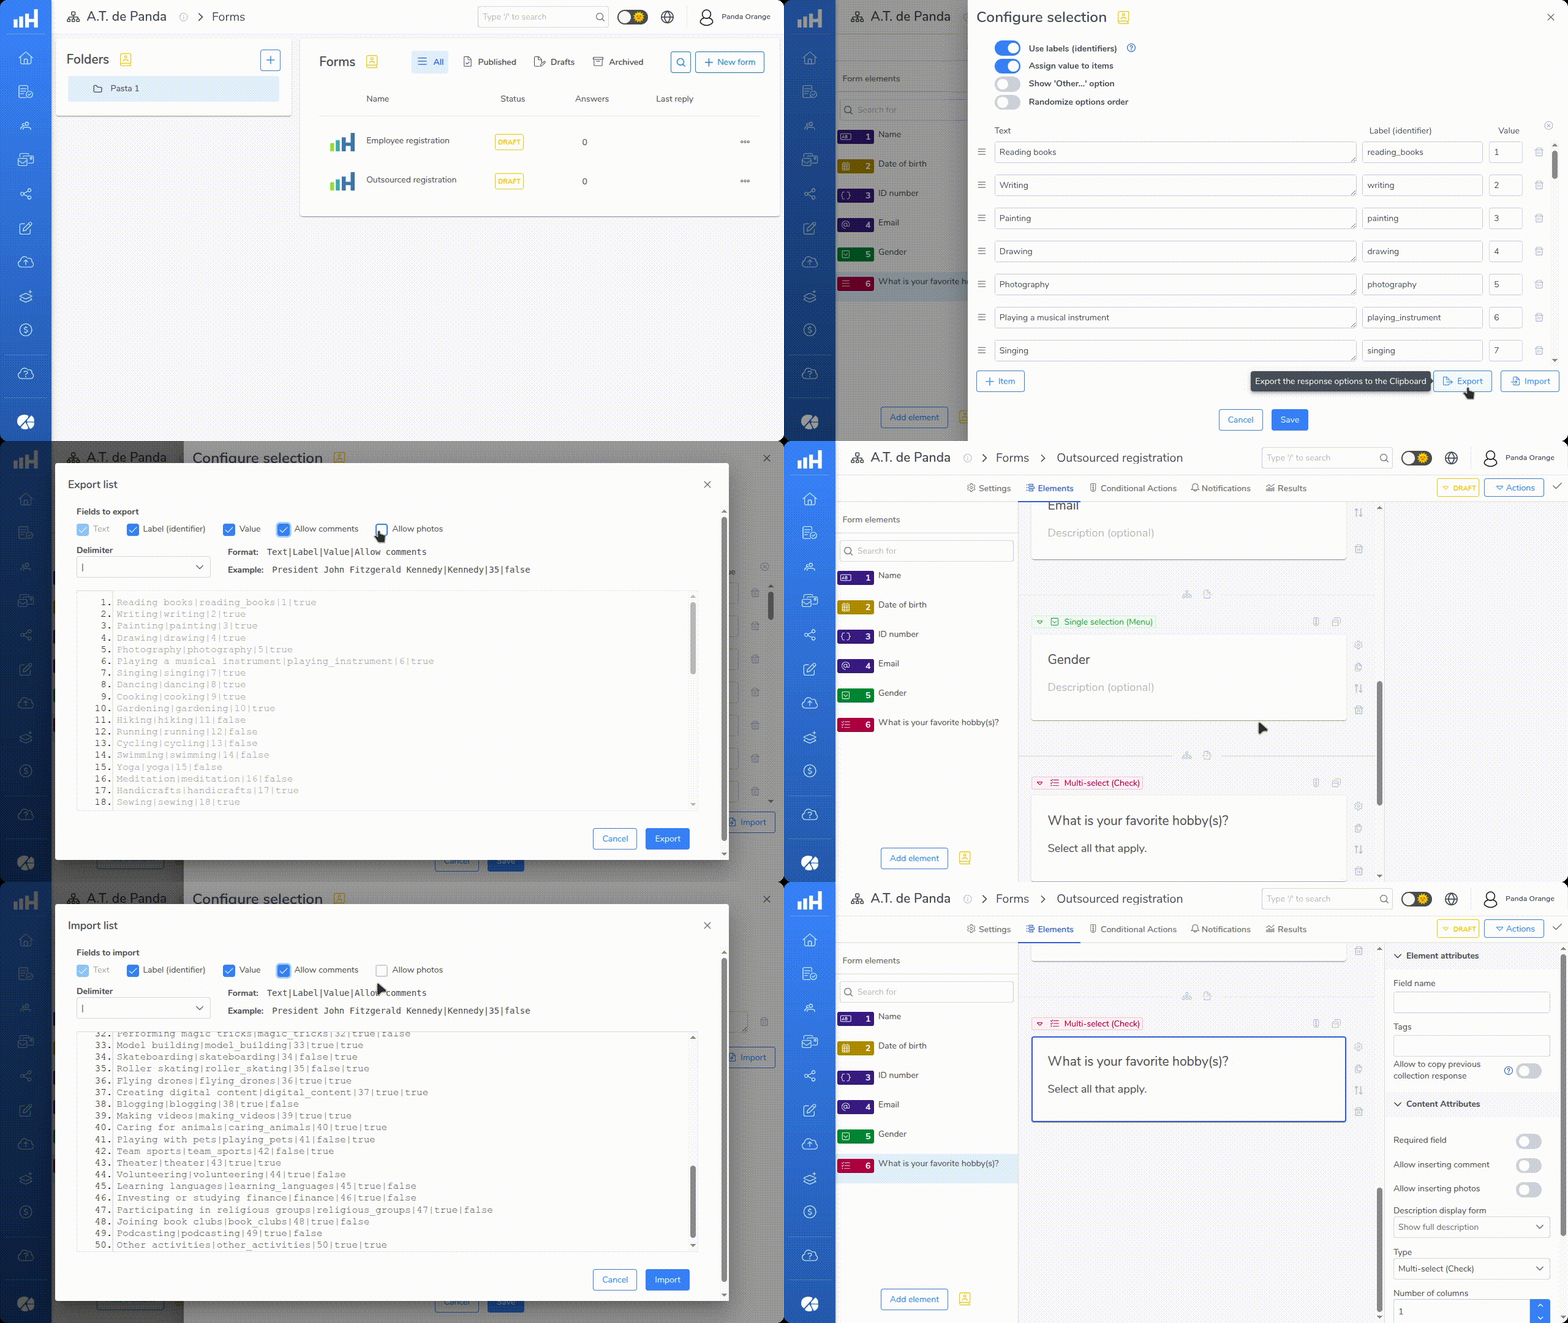
To Export Answer Options to the Clipboard
- Click on
. A dialog box with export options will open;
- Define the fields to be included in the export of options: Text (always required), Label, Value, Allow comments, and Allow photos;
- Choose the field delimiter. See the options in the dropdown menu;
- Review the values and click on
, to complete.
- Now you can import the exported answer options into other elements without the need to clone the entire form.

Exporting answer options. Click the image to enlarge it