How to create a form
Forms are the main tool for collecting data. The correct creation of a form directly influences the success of the analysis of the collected data, as it ensures that relevant information is captured in an organized manner.
Properly defining questions and response types, such as numeric, text, date and time or multiple choice fields, is essential so that data can be easily analyzed and converted into knowledge for decision making.
To create or edit a form, managing its functionalities, click on , available in the Main Menu.

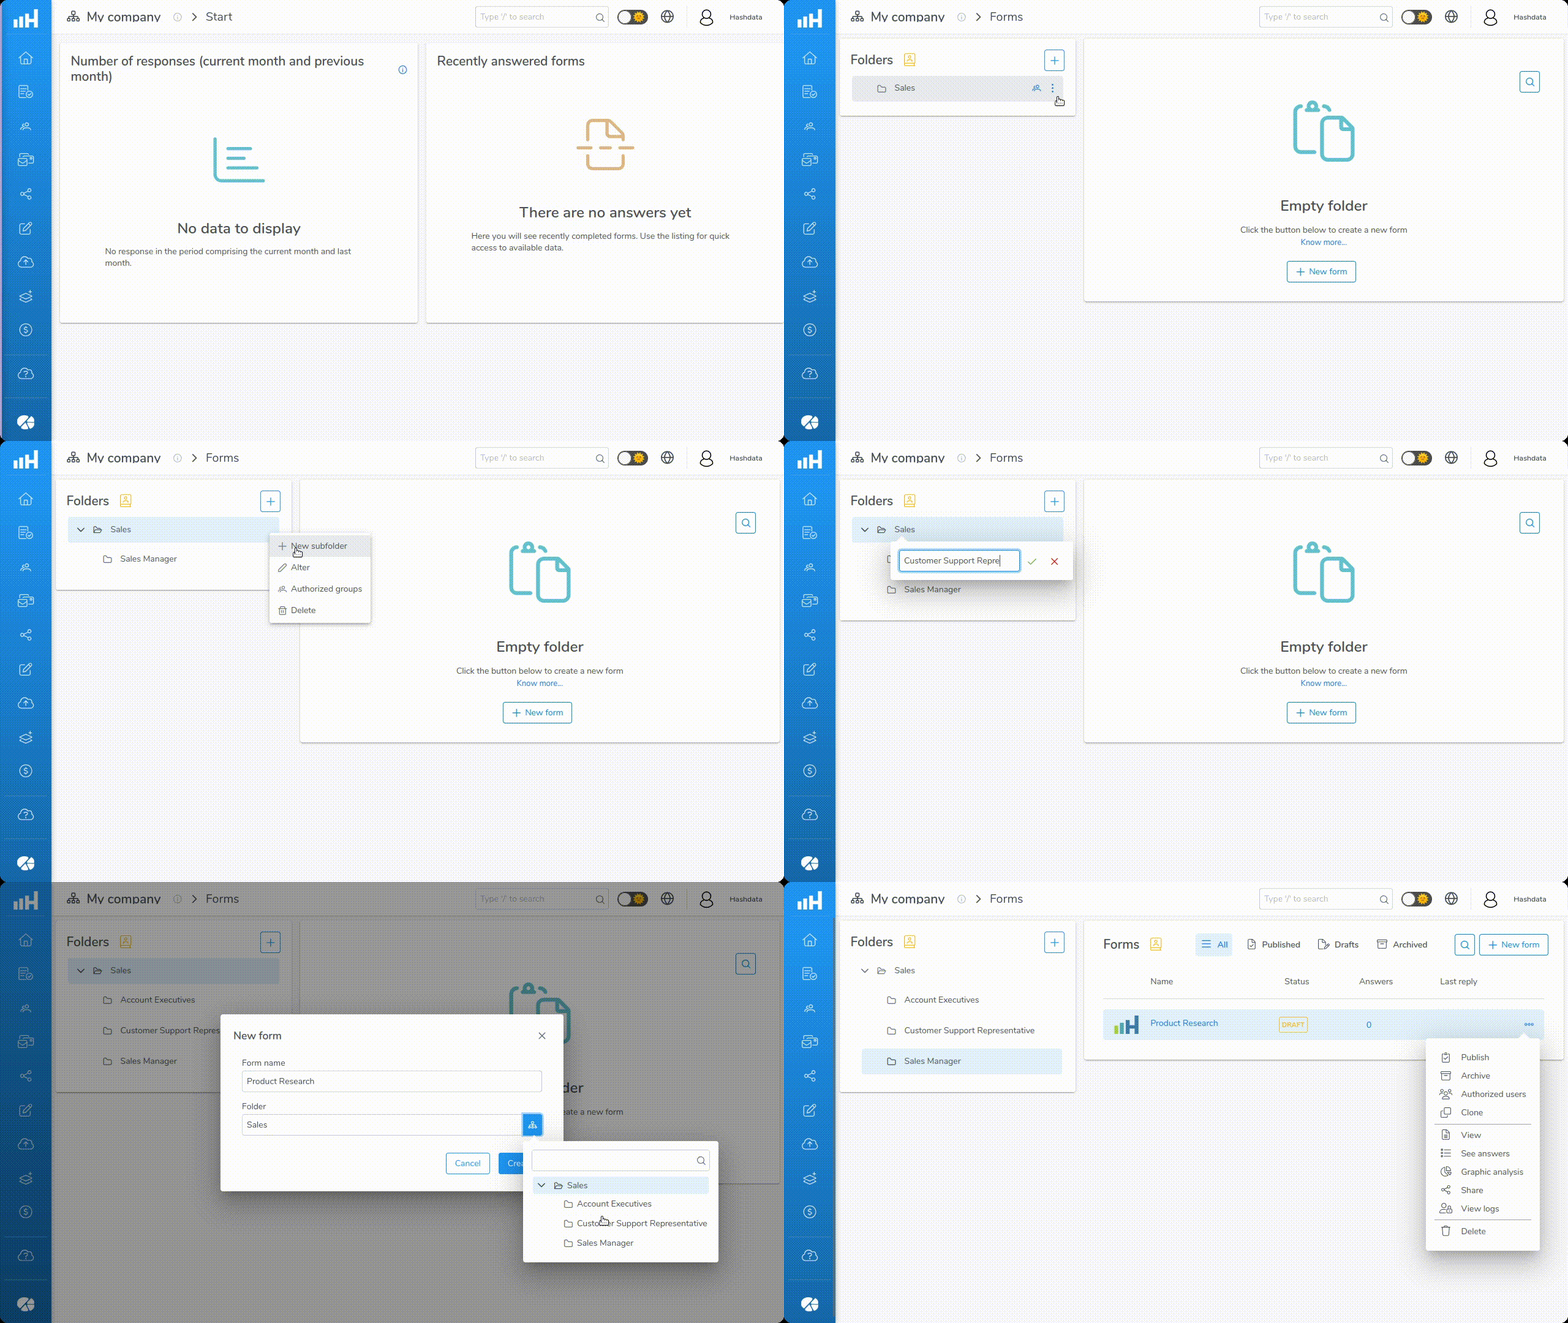
Presentation of the main functionalities of the Forms screen, such as folder management and form creation. Click on the image to enlarge it.
1. Set Workspace
Make sure the active workspace is the one in which you want to create the form. Forms will belong to the workspace that is active at the time of their creation.
Click here and see more details on how to change the active desktop.
2. Organize Forms into Folders
Folders are a way of organizing forms in a hierarchical structure, allowing you to group them according to their characteristics, purposes, themes, projects, dates or departments. This organization makes navigation, management, and access control easier, especially when dealing with a large volume of forms.
With this approach, you simply grant groups access to the appropriate folders. This way, when collaborators are included in groups and forms in folders, the access settings will be automatically applied, making it easier to manage access to forms.
Learn more how to configure access to forms.
Learn more how to register groups.
Learn more how to invite collaborators.
When a form is created, an option will be shown to define which folder or subfolder the form should be created in.
Folder Management
- To include a first-level folder, click New folder
, choose the folder name and confirm;
- To the right of each folder, click the More Options... button
:
- New subfolder: creates a subfolder;
- Change: changes the folder name;
- Authorized groups: defines which groups will have access to the folder;
- Delete: deletes the folder.
- The Authorized Groups button
allows you to manage which groups will have access to the folder. When you click this button, all available groups are shown on the right side of the screen. Select the groups which should have access to the folder.
Subgroups do not inherit access authorization from the parent (ascendant) group, that is, when authorizing a group to have access to a certain folder, its subgroups do not inherit access to the folder. Therefore, determining which folders each group can access must be done individually (group by group).
3. Create a Form
- Click
;
- Set the form name;
- Select the destination folder or subfolder;
- Click on "Create" or use the shortcut key "Ctrl+S.
See the figure at the beginning of this page. It shows the main features of the Forms screen, including folder management and creating a form.
4. Add Elements to Form
After creating the form, the editing screen for the structure and features of the created form will open. In the left sidebar of this screen, the elements are available.
The elements are the components that make up the structure of the form, allowing data collection. In other words, elements are the types of questions available to be inserted into a form.
Learn more how to add and configure elements in the form.
5. Set General Form Settings
Form settings allow you to customize the way forms are presented and processed.
Learn more how to configure general form settings.
5. Configure Form Access Permissions
Form settings allow you to customize the way forms are presented and processed.
Learn more how to configure general form settings.